I could not seem to get the surveys to work correctly in Stellarium. And then with Stellarium on the freshly deployed Ubuntu workstation, I couldn't seem to get the basic DSS survey to work at all. What the hey?!
So, I decided to sort it out, once and for all.
This was triggered some time ago as Chris V and I were discussing our review processes of observing certificates. If I remember correctly, I had shared with him that I developed a guide with sky charts for checking the targets in the Double Stars program. In fact, I had made two guides, for the two telescope orientations. Chris told me he used Stellarium with a survey enabled.
I just enabled the Stellarium DSS and the oculars FOV, then bounced from object to object using the bookmarks we created and set the Stellarium Date/Time to [the] logged observation.
That was intriguing. I was curious how it would work.
After that discussion, I believe on the John Kim Chi computer, with a clean-install late-version of Stellarium on Windows, I tested it. I thought I got it working. And saw the benefit of what he enjoyed, seeing full-colour survey imagery. I was certain I had it working!
I recalled going into Surveys tab of the Sky and Viewing Options window. At first I think I clicked the first couple of entries listed, some of the 2MASS options. But later I found the "DSS colored" survey. That sounded really familiar.
But yesterday, when I tried to replicate the steps, now on the Surface Book 1, with Ubuntu 22.04.1 LTS 64-bit, with Stellarium 1.1, it didn't work. Gar!
I tried again today. Nope. Still no go.
I was clearly doing something wrong.
Stepped back. Read the manual. Yes. Read the manual. Googled around a bit. Carefully tried the options. And figured it out.
So, here it is. Here are the proper steps for using the surveys in Stellarium.
§
Consider the Required Survey
There are two ways to show a survey background in the virtual sky of Stellarium. A quick way and a more involved way.
The quick option uses the DSS coloured survey which is a realistic full-colour background. This is what Chris was referring to... Which I didn't fully understand at first.
The more involved method allows the display of any one of a multitude of different surveys available, a hierarchical progressive mapping, notably in different spectra, e.g. x-ray or radio.
Stellarium appears to offer detailed surveys of some planets and moons. This is not discussed in this thread.
Preliminary Steps, Stage 1: Preparing The Toolbar
To make it easy to toggle on and off a survey, you should add at least one button to the toolbar.
- From the left toolbar, click the Configuration button or press F2.
- Click the Extras tab.
- In the Show Additional Buttons section, toggle on the required buttons:
- To show the Digitized Sky Survey 2, click the DSS Survey checkbox.
- To show one of the Hierarchical Progressive Surveys, click the HiPS Surveys checkbox.
- Close the Configuration window.
- Examine the horizontal toolbar for the new button(s).
Preliminary Steps, Stage 2: Selecting a HiPS Survey
This is an optional process, only required if you want a background using an alternate survey. e.g. AKARI Far-Infrared All-Sky Survey - Band N160 (160 micron).
- From the left toolbar, click the Sky and Viewing Options button or press F4.
- Click the Surveys tab.
- Ensure the category menu shows Deep Sky.
- Scroll the list of all-sky surveys, as needed.
- Click the label or name of the survey of interest and read the description.
- To show a HiPS survey, click the checkbox to the left of the name.
- Uncheck any other active survey, avoiding more than one.
- Close the Configuration window.
Enabling the Display: Showing a Sky Survey
With the toolbar configured, and possibly a HiPS survey selected, you are ready to change the appearance of the sky background in Stellarium. Unfortunately, there is no keyboard shortcut, by default, for the DSS option.
- Ensure you have an active internet connection.
- Zoom in all appropriate amount, avoiding a wide field view if possible.
- From the bottom toolbar, click the appropriate button:
- To show the Digitized Sky Survey 2, click the DSS button.
- To show the selected Hierarchical Progressive Survey, click the HiPS button or press Ctrl Alt d.
- Pan or search as per normal.
- You will likely want to toggle off the ground and air settings as well.
Some Examples
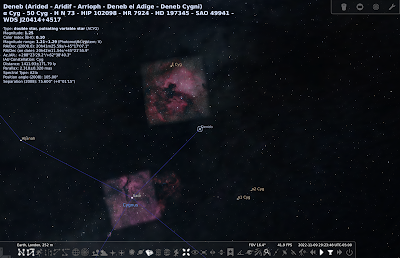
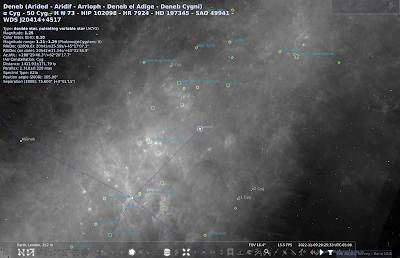
I am showing the same part of the sky in the software, centred on the star Deneb in Cygnus, with the rendered Milky Way in the background.
For the full effect, I think you will want to click on these images to embiggen... Wait for the images to load. Then cycle through them with your left or right arrow keys.
Above, regular mode. Stellarium without a survey background. The default mode shows some images for specific deep sky objects. The upper image is for the North American and Pelican nebulae only; the lower image is the Sadr region. Sometimes this is clunky, with the stark square framing.
Button enabled in the toolbar: background DSO images.
Above, now the DSS mode is enable and Stellarium shows the DSS 2 coloured survey in the background. The individual separate deep sky images are suppressed. Note, there are artefacts in the survey tiles...
Button enabled in the toolbar: DSS.
And now, above, showing the AKARI far-infrared survey, with the nebula or DSO markers enabled. An amazing heat map of the region... Look at the hot spots in the Coal Sack area, blocked by opaque dust.
Button enabled in the toolbar: HiPS.
I hope these steps clarify matters for Stellarium users. I was terribly confused for a while but it all makes sense now.
And it is quite fascinating some of these surveys, seeing beyond the limits of human vision, of course. One can have a lot of fun with this. This can also be very useful in an educational context.


No comments:
Post a Comment