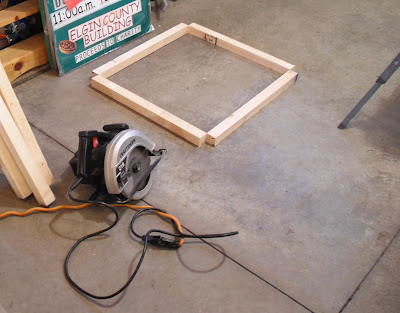
This was an effort to verify the proper inner dimensions of the box. The telescope "footprint" is 27 by 14 inches, including focuser, counterweight shaft, and other bits that stick out. The wood pieces on the floor were cut to 23 (width) and 21 (depth) inches. I measured the inner diagonal and there appeared to be enough room. These pieces will not actually be used on the bottom; again, they just helped me know that my initial measurements were correct.
Next I began work on one of the side elements. I cut the front and back supports a bit longer than originally planned (57" and 49" tall respectively). Can't hurt, a bit more height inside the box... Initially, I cut the supports square.

On the floor, I squared the bottom piece to the upright supports. Then with a long piece of wood, I was able to score a line from the peak of the front support to the lowest point of the back support. It looked like about a 30° angle. I cut the upright tops at the appropriate angle and then scored and cut the top support. Mom's table saw was very helpful.

Left wall done. Everything was screwed together with 3" wood deck screws.
Again, I did some test measurements. Upright clearance for the telescope optical tube looked good.
I realised I made a mistake in my wood cutting. I had not pre-planned the most efficient or optimal use of the wood so I wasted a bit of the new 2x2. Forgot to use my spreadsheet's "solver" feature! Fortunately, Mom had lots of new 2x4s so I was able to incorporate some of it into the structure. This also allows for some "cross bracing" at places. That said, I do not want the box to be too heavy. And it does not need to be incredibly strong.
I decided to take an organic approach: rather than make the other side, I started adding the back and top elements.

More 2x4s to the rescue.
The other side went together quickly. Before I knew it, I had the basic structure done.

The bottom front brace was not attached at this stage; it was just wedged in place.
I took a break for a hot turkey sandwich. Yum! After dins, I headed back out to the garage. And spent most of my time just staring at the thing. I did add the 2x2 to the front face, near the top. This will support the small front facia above the door, to which I'll attach the drip edge. And I finally screwed in the bottom 2x4 piece.

All but finished.
The whole thing is pretty square.
I considered where the hinges will attach, on the left. I will put additional framing here for support. I measured the front door opening (50" x 23"). I considered, for a long time, how I would proceed.
Finally, I realised there was nothing else I could accomplish tonight. Headed inside to do some more paperwork planning, supplies planning, to learn about shingling, and to think more about how the door would work.


No comments:
Post a Comment